Tutorial
Click on thumbnailed images to enlarge
Brushes here!
{//*brush credit to KeepWaiting @Deviantart.com*//}
Now we shall begin the Tutorial!
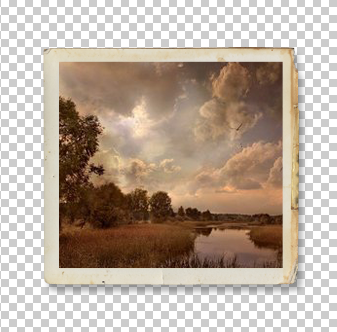
Step 1) Select your image, this shall be mine:

(//*make sure the image gets saved to your desktop!*//}
Step 2) open a new file in photoshop {dimensions aprox. 550 x 450} and go to the right pannel and click the dropdown menu that should say 'backgrounds' in it and select frames!

Step 3) After selecting 'Frames' continue on by clicking the dropdown menu to the right of that one and select 'vintage'!

Step 4) After selecting 'vintage' you may now select your frame of choice from the selction, I recommend the first frame in the second row! After selecting a frame click apply, which should bring the frame onto your editing area.
You might want to resize your frame to what you think your image size is, but if you get it wrong you can always try again!
After resizing your frame click the center of it and choose your image from your desktop!
Here's what mine looks like so far:
Step 5) Change the dropdown menu that now says 'frames' to 'backgrounds', and after doing that change the dropdown menu next to that which now says 'baby' to 'texture', selecting the texture named 'linen' which is on the fourth row second from the left. After clicking on linen click apply.
This is what mine looks like now:

Step 6) Now after adding that background you now load the tape brushes and "tape" your picture to the wall.
Load brushes like this:
1. click on the brush tool
2. dropdown the brush dropdown menu and click on the arrow on the right side of the dropdown menu

3. Then click on 'load brushes...' at the bottom and load the brushes from your desktop that you downloaded at the begining of this tutorial.
Step 7) Now you may turn your image, write on the image or 'wall' and place the tape where ever you want, I highly recommend #a1936f as a tape color.
This is how mine looks when finished:

I hope you enjoyed this tutorial!
Tutorial Comments
Showing latest 10 of 32 comments

this is really cute:)

this is awesome!! i used photoshop elements 6.0 it was a little difficult but i figured it out in the end, it was just a bit hard to find some things but yeah awesome!! ^_^
Well, I don't have PS Elements, just CS3. However, the tape brushes work great in CS3. Very nice brushes. I also would like to see a tut to get the same effect (the hard way) in cs3

Great tutorial. But who the hell has photoshop elements? >

the vintage photo looks great! but is there a way to do this in photoshop 7 or cs2?

how can I do this on photoshop cs2?
hey how or were in the world can i find photoshop or is there any other wayi can do it
I was going to ask the same thing kor3anlove18 asked you.
And one more thing...after you get the final thing...how do you upload it..or get the code from it..if you can't use photobucket or whatever...?I'm VERY new at this, and I apologize if I'm taking up your time...
hey. how do i get photoshop element 5 if not, how do i do it on photoshop 6.0? AND THIS RAWKS!(: THANKS!
is it possible for you to make this tutorial for Adobe Photoshop CS2?
I really enjoyed it, but couldn't find the frames and stuff when I tried with my program.
Tutorial Details
| Author |
Mm-giraffe
|
| Submitted on | Jul 14, 2007 |
| Page views | 53,539 |
| Favorites | 205 |
| Comments | 32 |
| Reviewer |
flardnarf
|
| Approved on | Jul 15, 2007 |