
Tutorial
Click on thumbnailed images to enlarge
**NOTE**
I did this tutorial in Photoshop CS3 Extended which is why some of you may have problems. However, that does't mean this tutorial won't work in other versions of Photoshop. Just try it out.
Ever wondered how to make your text look windy? I bet not but now you can with my tutorial! :) Here's the before:

Here's the after:

Let's start.
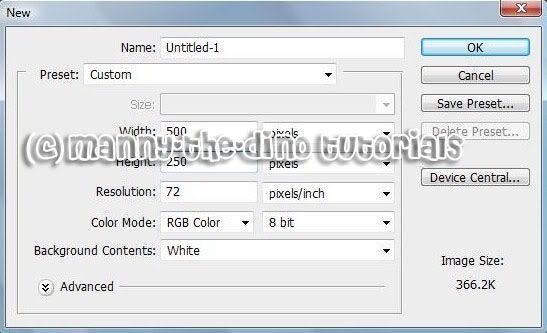
001.Open up photoshop & go File>New.

002.Make it whatever size you like. I used 500 as my width & 250 as my height.
003.Select your Paint Bucket Tool (G).

004.Fill your document with black.

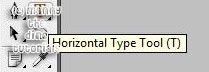
005.Select your typing tool.
006.Type "Windy". (if you want to know the font i used, i used "Charlemagne Std" at 125pt in bold)

007.Do a ctrl+j twice. Your layers should look like this:

008.Go Filter>Blur>Motion Blur.
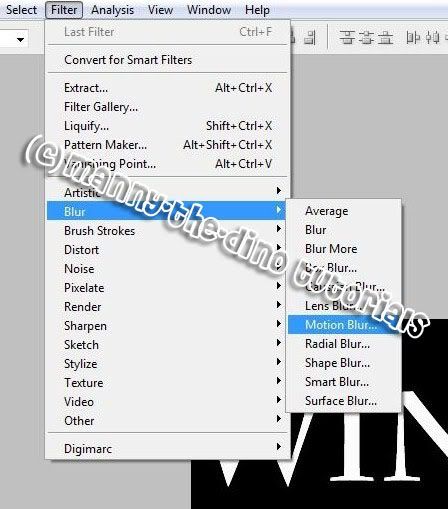
009.Enter 100 as your distance when the window pops up.

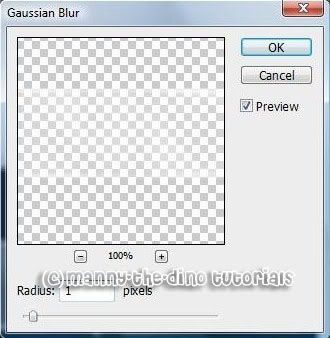
010.Now go Filter>Blur>Gaussian Blur.
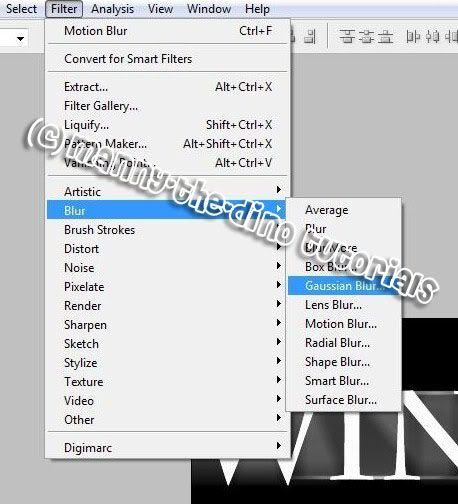
011.Enter 1 as your radius.
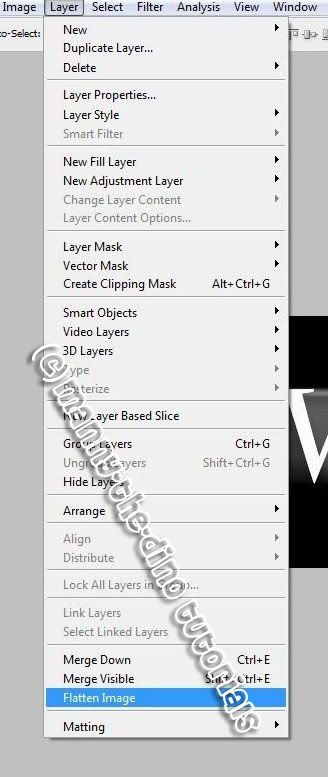
012.Go Layer>Flatten Image.
013.And now you have your final product! Cool, huh?
If you got lost or have any questions, comment the tutorial & I'll get back to you as soon as I can. :D
I did this tutorial in Photoshop CS3 Extended which is why some of you may have problems. However, that does't mean this tutorial won't work in other versions of Photoshop. Just try it out.
Ever wondered how to make your text look windy? I bet not but now you can with my tutorial! :) Here's the before:
Here's the after:
Let's start.
001.Open up photoshop & go File>New.
002.Make it whatever size you like. I used 500 as my width & 250 as my height.
003.Select your Paint Bucket Tool (G).
004.Fill your document with black.
005.Select your typing tool.
006.Type "Windy". (if you want to know the font i used, i used "Charlemagne Std" at 125pt in bold)
007.Do a ctrl+j twice. Your layers should look like this:
008.Go Filter>Blur>Motion Blur.
009.Enter 100 as your distance when the window pops up.
010.Now go Filter>Blur>Gaussian Blur.
011.Enter 1 as your radius.
012.Go Layer>Flatten Image.
013.And now you have your final product! Cool, huh?
If you got lost or have any questions, comment the tutorial & I'll get back to you as soon as I can. :D
Tutorial Comments
Showing latest 3 of 3 comments

sweettt!!!
so coool
By eternalxreminiscence on Feb 2, 2009 2:24 pm

Very cool! thanks!
By kimt08 on Dec 15, 2007 2:52 pm

screammynameandspillyourhearto ut@yahoo.com
By lheean on Nov 17, 2007 7:38 am
Tutorial Details
| Author |
manny-the-dino
|
| Submitted on | Nov 15, 2007 |
| Page views | 14,692 |
| Favorites | 24 |
| Comments | 3 |
| Reviewer |
IVIike
|
| Approved on | Nov 15, 2007 |