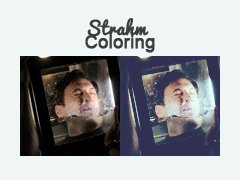
Tutorial
Click on thumbnailed images to enlarge
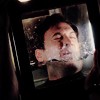
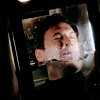
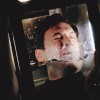
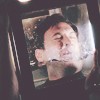
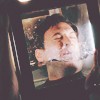
Step one, as always, start with a picture.
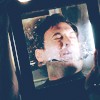
Crop it, and resize to 100x100.
Create a new layer. Fill it with 242c54. Set it to Exclusion at 55%.
Duplicate the base (background layer). Drag it above the fill layer we just made [a.k.a. to the top of the layer panel] and set it to Darken at 100%.
Create a new Selective Color layer with the following settings:
Reds
Cyan -100
Magenta +27
Yellow +35
Black 0
Yellows
Cyan +100
Magenta 0
Yellow -24
Black 0
Whites
Cyan 0
Magenta 0
Yellow 0
Black -44
Neutrals
Cyan +1
Magenta 0
Yellow -6
Black 0
Blacks
Cyan 0
Magenta 0
Yellow 0
Black +23
Now, create a Color Balance layer with the following settings:
Shadows -25 -11 -15
Midtones +23 +6 -14
Highlights -20 -10 +9
Also, make sure that the Preserve Luminosity box is checked.
Next, create a new layer. Fill with 181517. Set to Screen at 100%.
Create a new layer. Fill with Feeffe. Set to Soft Light at 100%.
Create another Selective Color layer with the following info:
Reds
Cyan -100
Magenta +15
Yellow +100
Black 0
Yellows
Cyan -100
Magenta -100
Yellow +100
Black 0
Cyans
Cyan +100
Magenta +100
Yellow +100
Black +100
Blues
Cyan +100
Magenta -100
Yellow +100
Black +100
Create a new layer. Fill with 568299. Set to Soft Light at 100%.

Make a new Selective Color layer with the following settings:
Blacks
Cyan +15
Magenta +1
Yellow -14
Black 0

Create a Brightness/Contrast layer with the following settings:
Brightness 0
Contrast +16
Create a new layer. Fill it with ff0084. Set it to Exclusion at 10%.
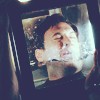
Done!
Other Examples:


Crop it, and resize to 100x100.
Create a new layer. Fill it with 242c54. Set it to Exclusion at 55%.
Duplicate the base (background layer). Drag it above the fill layer we just made [a.k.a. to the top of the layer panel] and set it to Darken at 100%.
Create a new Selective Color layer with the following settings:
Reds
Cyan -100
Magenta +27
Yellow +35
Black 0
Yellows
Cyan +100
Magenta 0
Yellow -24
Black 0
Whites
Cyan 0
Magenta 0
Yellow 0
Black -44
Neutrals
Cyan +1
Magenta 0
Yellow -6
Black 0
Blacks
Cyan 0
Magenta 0
Yellow 0
Black +23
Now, create a Color Balance layer with the following settings:
Shadows -25 -11 -15
Midtones +23 +6 -14
Highlights -20 -10 +9
Also, make sure that the Preserve Luminosity box is checked.
Next, create a new layer. Fill with 181517. Set to Screen at 100%.
Create a new layer. Fill with Feeffe. Set to Soft Light at 100%.
Create another Selective Color layer with the following info:
Reds
Cyan -100
Magenta +15
Yellow +100
Black 0
Yellows
Cyan -100
Magenta -100
Yellow +100
Black 0
Cyans
Cyan +100
Magenta +100
Yellow +100
Black +100
Blues
Cyan +100
Magenta -100
Yellow +100
Black +100
Create a new layer. Fill with 568299. Set to Soft Light at 100%.
Make a new Selective Color layer with the following settings:
Blacks
Cyan +15
Magenta +1
Yellow -14
Black 0
Create a Brightness/Contrast layer with the following settings:
Brightness 0
Contrast +16
Create a new layer. Fill it with ff0084. Set it to Exclusion at 10%.
Done!
Other Examples:
Tutorial Comments
No comments yet. Be the first one to comment!
Tutorial Details
| Author |
xchangminniex
|
| Submitted on | Jul 12, 2012 |
| Page views | 4,837 |
| Favorites | 0 |
| Comments | 0 |
| Reviewer |
Mickey
|
| Approved on | May 26, 2013 |