Tutorial
Click on thumbnailed images to enlarge
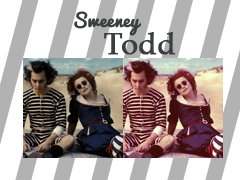
I have recently fallen in love with Sweeney Todd, so I decided to make a coloring tutorial to go along with my new found obsession.
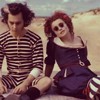
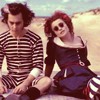
So start with a cool picture.

Then crop it to whatever image you want and resize it to 100x100.
Create a new layer. Fill it with 3d2424. Set that layer to Exclusion at 10%.
Create a new layer. Fill it with fd00bf. Set that layer to Exclusion at 10% as well.
Select Layer- New Adjustment Layer- Selective Color.
Enter the following information:
Neutrals
Cyan -21
Magenta +8
Yellow +7
Black -8
Select Layer- New Adjustment Layer- Selective Color.
Enter the following information:
Whites
Cyan +11
Magenta -29
Yellow +12
Black -14
Blacks
Cyan +26
Magenta -12
Yellow +16
Black +1
Select Layer- New Adjustment Layer- Selective Color.
Enter the following information:
Neutrals
Cyan 0
Magenta 0
Yellow -9
Black 0
Blacks
Cyan -19
Magenta +9
Yellow 0
Black 0
Select Layer- New Adjustment Layer- Brightness/Contrast.
Enter the following information:
Brightness 0
Contrast +9

(If you amp up the Brightness/Contrast as such:
Brightness +14
Contrast +21
Then you will get a much brighter icon.
 )
)
Select Layer- New Adjustment Layer- Hue/Saturation.
Enter the following information:
Master
Hue 0
Saturation +10
Lightness +5
Layer- New Adjustment Layer- Selective Color
Enter the following information:
Reds
Cyan 0
Magenta 0
Yellow +14
Black 0
Neutrals
Cyan 0
Magenta 0
Yellow -2
Black -4

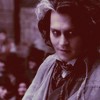
(This is the finished product with the higher Brightness/Contrast.
 )
)
Ta da!
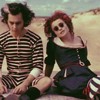
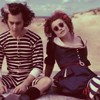
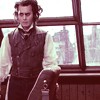
Other Examples:
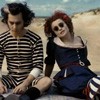
With less Brightness/Contrast


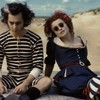
With more Brightness/Contrast
So start with a cool picture.
Then crop it to whatever image you want and resize it to 100x100.
Create a new layer. Fill it with 3d2424. Set that layer to Exclusion at 10%.
Create a new layer. Fill it with fd00bf. Set that layer to Exclusion at 10% as well.
Select Layer- New Adjustment Layer- Selective Color.
Enter the following information:
Neutrals
Cyan -21
Magenta +8
Yellow +7
Black -8
Select Layer- New Adjustment Layer- Selective Color.
Enter the following information:
Whites
Cyan +11
Magenta -29
Yellow +12
Black -14
Blacks
Cyan +26
Magenta -12
Yellow +16
Black +1
Select Layer- New Adjustment Layer- Selective Color.
Enter the following information:
Neutrals
Cyan 0
Magenta 0
Yellow -9
Black 0
Blacks
Cyan -19
Magenta +9
Yellow 0
Black 0
Select Layer- New Adjustment Layer- Brightness/Contrast.
Enter the following information:
Brightness 0
Contrast +9
(If you amp up the Brightness/Contrast as such:
Brightness +14
Contrast +21
Then you will get a much brighter icon.
)Select Layer- New Adjustment Layer- Hue/Saturation.
Enter the following information:
Master
Hue 0
Saturation +10
Lightness +5
Layer- New Adjustment Layer- Selective Color
Enter the following information:
Reds
Cyan 0
Magenta 0
Yellow +14
Black 0
Neutrals
Cyan 0
Magenta 0
Yellow -2
Black -4
(This is the finished product with the higher Brightness/Contrast.
)Ta da!
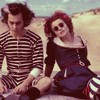
Other Examples:
With less Brightness/Contrast
With more Brightness/Contrast
Tutorial Comments
Showing latest 1 of 1 comments

Tutorial Details
| Author |
xchangminniex
|
| Submitted on | Jul 5, 2012 |
| Page views | 8,578 |
| Favorites | 4 |
| Comments | 1 |
| Reviewer |
manny-the-dino
|
| Approved on | Jul 11, 2012 |