Tutorial
Click on thumbnailed images to enlarge
NOTES
Before we get started, I just want to address that this was made in Photoshop CS4. I'm not sure if there's different settings from CS3 and whatnot, but just give it a go and see what happens. And keep in mind, just because certain settings are used, you might (depending on your picture) have to alter and play with the settings. Do whatever you may like. =D
All right, so are you ready? Lets get to it now, shall we?
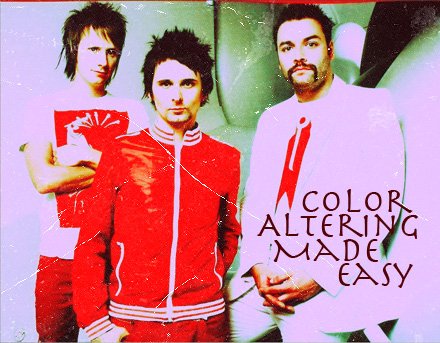
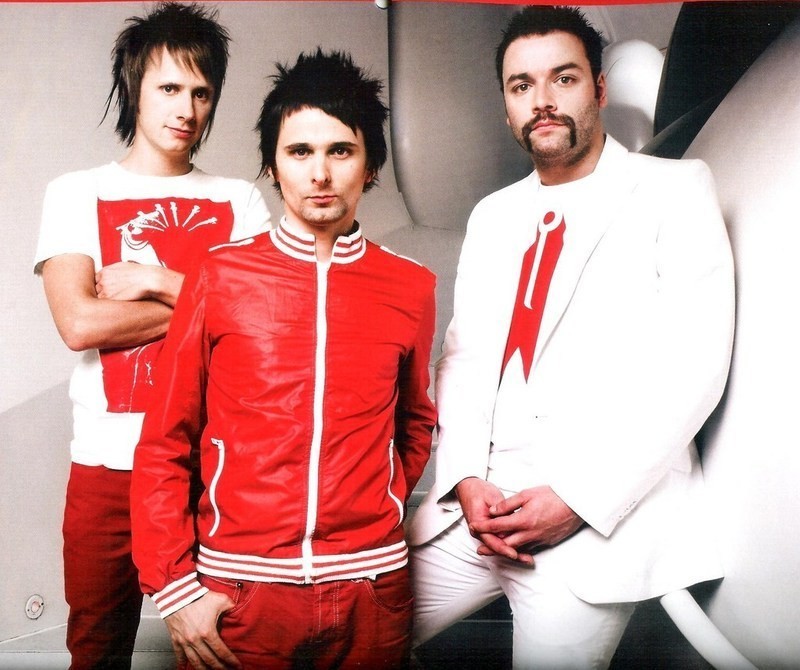
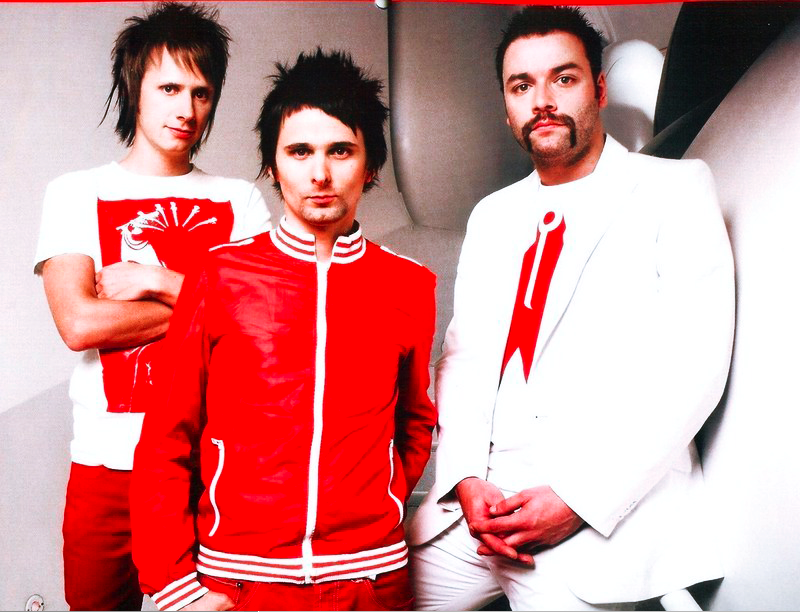
For this tutorial I will be using a photo of the band, Muse, and remember to CLICK ON THE THUMBS TO ENLARGE!!
1. DO NOT CROP YOUR PICTURE. Especially if this is being used for an avatar, don't crop the picture until you're completely done. Make sure the picture is zoomed into 100% so you can tell EXACTLY what is happening with the picture.
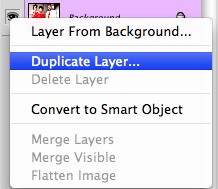
2. Duplicate the background layer.
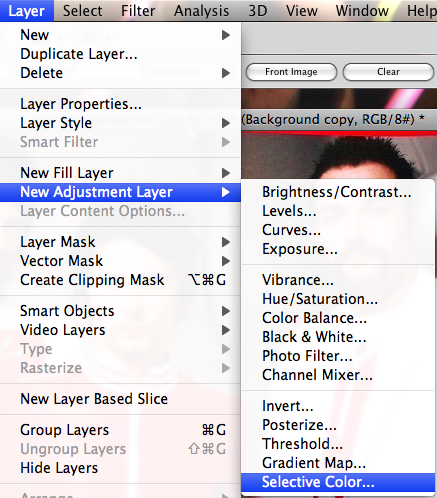
3. Go to Layer>New Adjustment Layer>Selective Coloring.
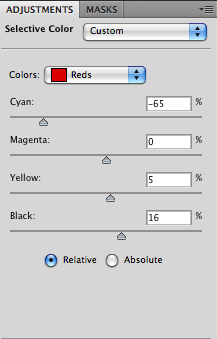
4. Now that you're there, apply these settings:
REDS: -65, 0, +5, +16
WHITES: 100, 46, -27, -68
For those of us who need some visual aids:

After coloring (depending on your picture) you should have something close to this effect:
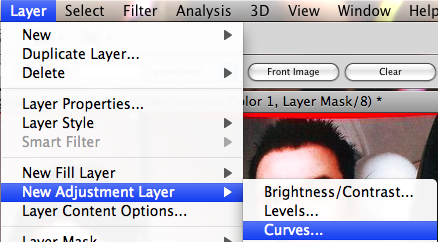
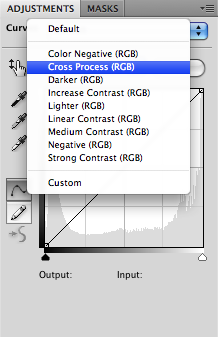
5. Now, carrying on. Go to Layer>New Adjustment Layer>Curves and set adjustments to "cross process". This is where it might differ from other versions of photoshop, but it's honestly not needed. IF you have CS4, though, use this setting.
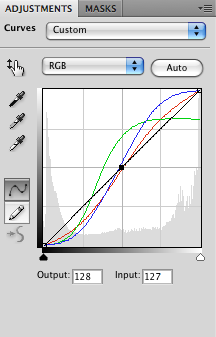
6. After that is finished, type these settings into the input and output boxes:
OUTPUT: 128
INPUT: 127
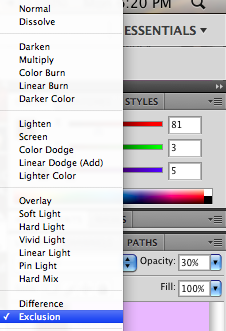
7. Now it's time to add some coloring. Go to Layer>New Layer:

8. Use the paint bucket tool and fill the new layer with #510305. Set the blend mode to Exclusion, 30% (or whatever fits correctly for your image):
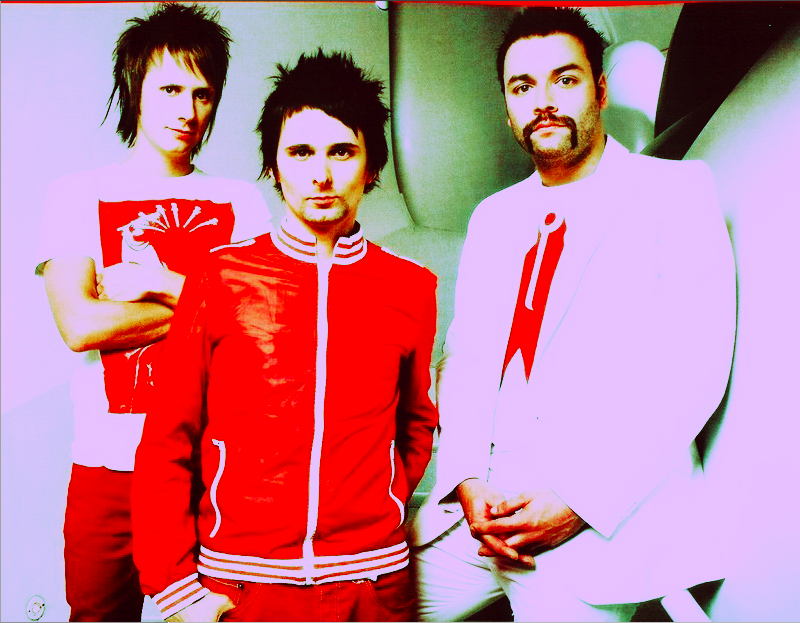
9. YOU'RE DONE! DO NOT forget to flatten the image when you're all complete:

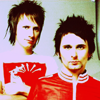
This is what the finished product should look like (here is the large form and the avatar form):
FULL IMAGE:
AVATAR:
Now you can go ahead and do whatever additional stuff you like to the image, such as adding textures, brushes, etc. Here are just a few things to keep in mind:
1. Alter the settings to YOUR OWN liking; this is just a guideline of a style.
2. KEEP THE PICTURE COMPLETELY ZOOMED IN, AND CROP AT THE VERY END.
3. If you don't have a particular setting, it DOES NOT mean the image cannot come out similar to this, sometimes it's a matter of messing with the settings.
4. And last of all, enjoy and have some fun!
Before we get started, I just want to address that this was made in Photoshop CS4. I'm not sure if there's different settings from CS3 and whatnot, but just give it a go and see what happens. And keep in mind, just because certain settings are used, you might (depending on your picture) have to alter and play with the settings. Do whatever you may like. =D
All right, so are you ready? Lets get to it now, shall we?
For this tutorial I will be using a photo of the band, Muse, and remember to CLICK ON THE THUMBS TO ENLARGE!!
1. DO NOT CROP YOUR PICTURE. Especially if this is being used for an avatar, don't crop the picture until you're completely done. Make sure the picture is zoomed into 100% so you can tell EXACTLY what is happening with the picture.
2. Duplicate the background layer.
3. Go to Layer>New Adjustment Layer>Selective Coloring.
4. Now that you're there, apply these settings:
REDS: -65, 0, +5, +16
WHITES: 100, 46, -27, -68
For those of us who need some visual aids:
After coloring (depending on your picture) you should have something close to this effect:
5. Now, carrying on. Go to Layer>New Adjustment Layer>Curves and set adjustments to "cross process". This is where it might differ from other versions of photoshop, but it's honestly not needed. IF you have CS4, though, use this setting.
6. After that is finished, type these settings into the input and output boxes:
OUTPUT: 128
INPUT: 127
7. Now it's time to add some coloring. Go to Layer>New Layer:
8. Use the paint bucket tool and fill the new layer with #510305. Set the blend mode to Exclusion, 30% (or whatever fits correctly for your image):
9. YOU'RE DONE! DO NOT forget to flatten the image when you're all complete:
This is what the finished product should look like (here is the large form and the avatar form):
FULL IMAGE:
AVATAR:
Now you can go ahead and do whatever additional stuff you like to the image, such as adding textures, brushes, etc. Here are just a few things to keep in mind:
1. Alter the settings to YOUR OWN liking; this is just a guideline of a style.
2. KEEP THE PICTURE COMPLETELY ZOOMED IN, AND CROP AT THE VERY END.
3. If you don't have a particular setting, it DOES NOT mean the image cannot come out similar to this, sometimes it's a matter of messing with the settings.
4. And last of all, enjoy and have some fun!
Tutorial Comments
Showing latest 4 of 4 comments

amazing
By forgetit on Jun 12, 2009 2:51 pm

I think that the fill layer was the only part that made the picture have the pinkish effect, no?
I love the picture, but maybe you should lower the opacity of the fill layer, so you can have an even balance and the colors will not over power.
By creole on Apr 23, 2009 7:37 am

nice. (:
By futura on Apr 23, 2009 2:25 am

Super cool effect!!! Thanks.
Regards,
image coloring
http://www.sblgraphi cs.com/Colouring-service.aspx
By sblgraphics on Apr 21, 2009 1:06 am
Tutorial Details
| Author |
xpwoppa
|
| Submitted on | Apr 20, 2009 |
| Page views | 6,128 |
| Favorites | 16 |
| Comments | 4 |
| Reviewer |
manny-the-dino
|
| Approved on | Apr 20, 2009 |