Tutorial
Click on thumbnailed images to enlarge
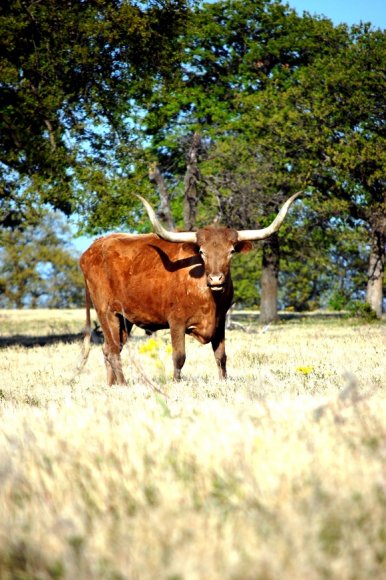
Before:
(After is at the end of the tutorial.)
All photos are different and have different lighting so you may need to skip some steps or change sttings
to your own liking.
Fist you will open gimp, then you will open the phoot of your choice.
Then go to colors>auto>white balance.
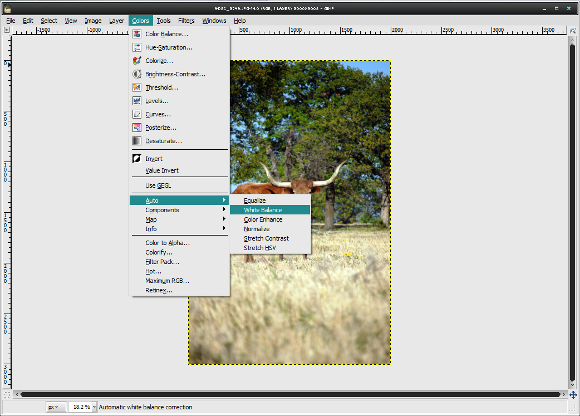
What this should do is make the whites whiter and imporve the lighting. You will want to use this on any
image the looks yellow due to poor lighting. Sometimes this will look unatural and if it doesnt work you
can hit CTRL+Z to undo it.
Next go to colors>brightness and contrast> and here you will want to play around with the settings.
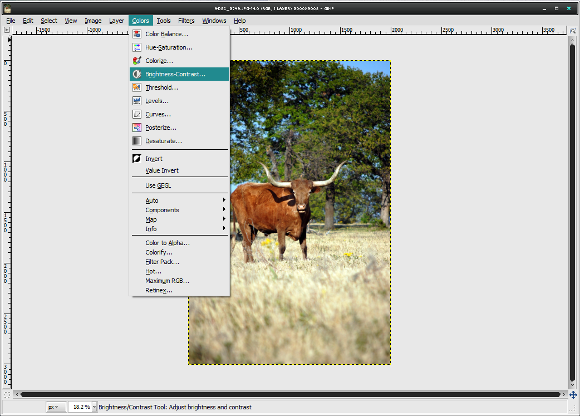
You may want to bring the brightness down and the contrast up or bring both up a little.
If you tick the preview box you can see what it looked like before.
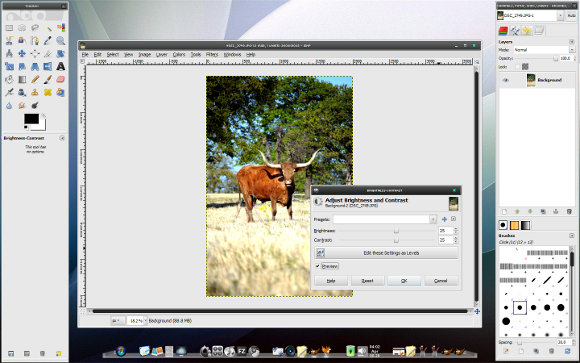
Do not do anything to extreme or noticeble. Dont bring the brightness or contrast over 50 in most cases.
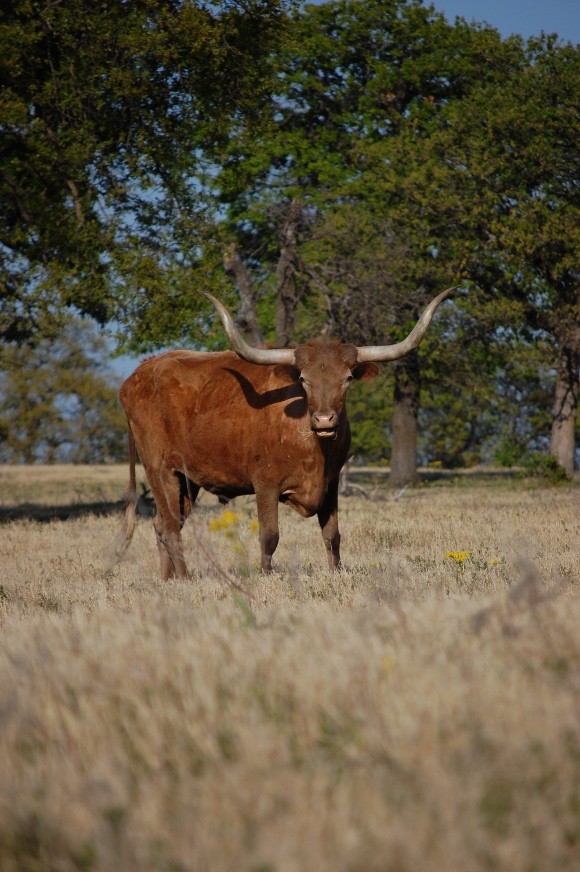
At this point your picture should be drastically better.

(After is at the end of the tutorial.)
All photos are different and have different lighting so you may need to skip some steps or change sttings
to your own liking.
Fist you will open gimp, then you will open the phoot of your choice.
Then go to colors>auto>white balance.
What this should do is make the whites whiter and imporve the lighting. You will want to use this on any
image the looks yellow due to poor lighting. Sometimes this will look unatural and if it doesnt work you
can hit CTRL+Z to undo it.
Next go to colors>brightness and contrast> and here you will want to play around with the settings.
You may want to bring the brightness down and the contrast up or bring both up a little.
If you tick the preview box you can see what it looked like before.
Do not do anything to extreme or noticeble. Dont bring the brightness or contrast over 50 in most cases.
At this point your picture should be drastically better.
Tutorial Comments
Showing latest 2 of 2 comments

I agree. This tutorial was verrrrrry good ^_^ I love it. *favorite*
By emberfly on Jul 11, 2009 6:15 pm

Thanks. This was a great tutorial. ^.^
By BananaNugg3ts on Jun 11, 2009 11:32 am
Tutorial Details
| Author |
Maccabee
|
| Submitted on | Apr 12, 2009 |
| Page views | 2,987 |
| Favorites | 5 |
| Comments | 2 |
| Reviewer |
manny-the-dino
|
| Approved on | Apr 12, 2009 |