Tutorial
Click on thumbnailed images to enlarge
This is my first tutorial, yay! Okay, so I've been using the same coloring for a while and I wanted to share it with you guys.
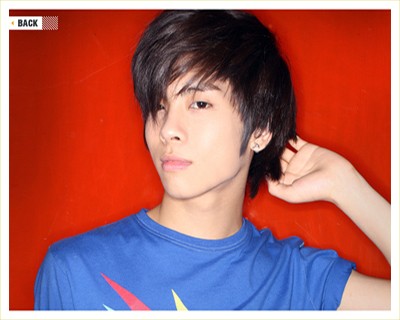
TO

Step One: Add a Color Balance adjustment layer with the following settings:
Midtones: -36, 0, +37
Shadows: -19, 0, +32
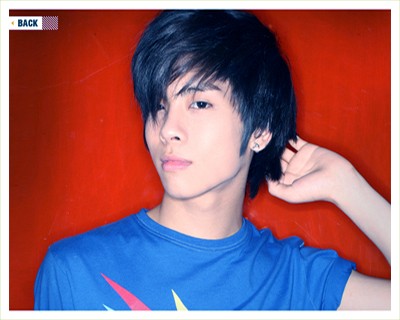
Step Two: Add a Selective Coloring adjustment layer with the following settings:
Reds: -30, 0, -5, +6
Yellows: +30, +10, -10, -10
Cyans: +10, -30, -10, -10
Blues: +10, -30, -10, -10
Magentas: +100, 0, 0, 0
Neutrals: +5, -4, -5, +16
Blacks: 0, 0, 0, +36
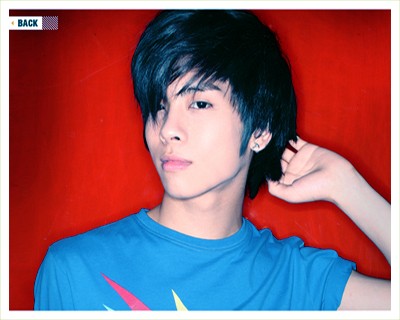
Step Three: Add a Hue/Saturation adjustment layer with the following settings:
Master: +10
Yellows: +20
Magentas: +10
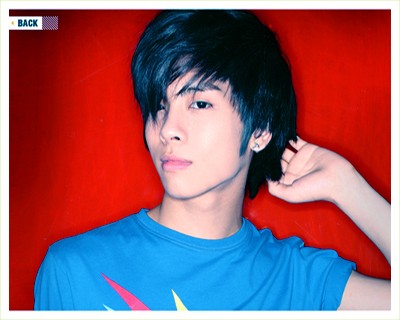
Step Four: Add a Brightness/Contrast adjustment layer with the following settings:
+5, +5
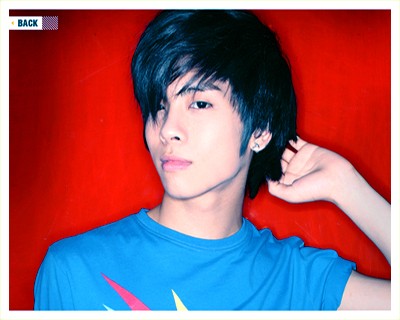
Step Five: Crop and resize it to 100x100.

And you're done! Please, remember that all images are not the same and the results will be different. Don't copy my steps exactly. Have fun and change it up a little. (=

TO

Step One: Add a Color Balance adjustment layer with the following settings:
Midtones: -36, 0, +37
Shadows: -19, 0, +32

Step Two: Add a Selective Coloring adjustment layer with the following settings:
Reds: -30, 0, -5, +6
Yellows: +30, +10, -10, -10
Cyans: +10, -30, -10, -10
Blues: +10, -30, -10, -10
Magentas: +100, 0, 0, 0
Neutrals: +5, -4, -5, +16
Blacks: 0, 0, 0, +36

Step Three: Add a Hue/Saturation adjustment layer with the following settings:
Master: +10
Yellows: +20
Magentas: +10

Step Four: Add a Brightness/Contrast adjustment layer with the following settings:
+5, +5

Step Five: Crop and resize it to 100x100.

And you're done! Please, remember that all images are not the same and the results will be different. Don't copy my steps exactly. Have fun and change it up a little. (=
Tutorial Comments
Showing latest 6 of 6 comments

I totally agree with KimT08. . .I saw Jonghyun-oppa and automatically clicked. The tutorial is okay, but I think you should've made the blue a bit darker.
By uncleronniexo on Apr 13, 2009 12:26 pm
caught my attention w/ jong hyun right away lol
By kimt08 on Jan 10, 2009 5:48 am
Wooo nice tutorial! and jonghyun looks nice on here hehe
By cmila92 on Dec 20, 2008 9:29 pm
nice tutorial and look it's jonghyun from shinee! :D
By doodleisLOVE on Nov 18, 2008 6:10 am
thanks lizzi. (:
By creole on Oct 23, 2008 12:44 pm
Gorgeous.
I'll have to try sometime. =)
By nonexistent on Oct 17, 2008 9:19 pm
Tutorial Details
| Author |
yumbae
|
| Submitted on | Oct 15, 2008 |
| Page views | 13,610 |
| Favorites | 36 |
| Comments | 6 |
| Reviewer |
manny-the-dino
|
| Approved on | Oct 17, 2008 |
