Tutorial
Click on thumbnailed images to enlarge
I DID NOT COPYRIGHT MY TUTORIAL SO PLEASE DO NOT STEAL ANYTHING.
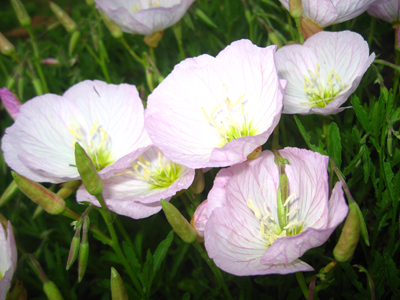
1. Choose a photo that you want to use for this tutorial. I chose this image:
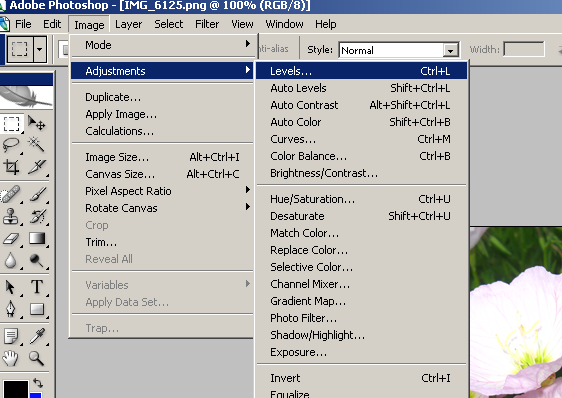
2. Now, we have to change the levels. Click on Image at the top and then hover your mouse over adjustments and select levels, which is the first choice that pops up.
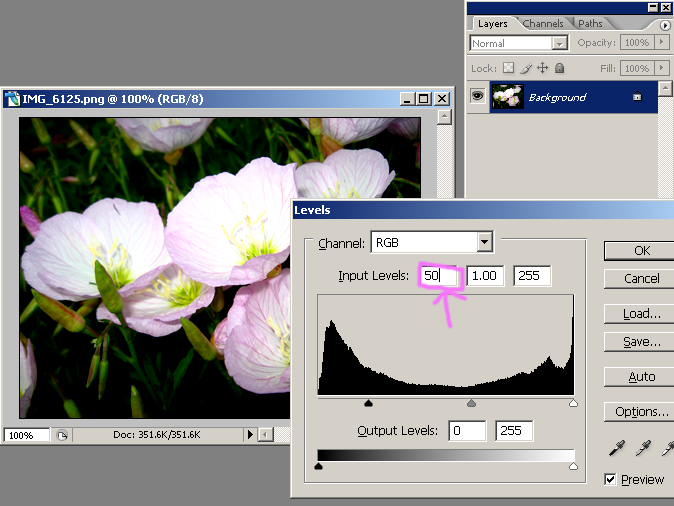
3. I set mine to 50, 0, 255; but you may change yours to whatever you like or whatever suits your picture.
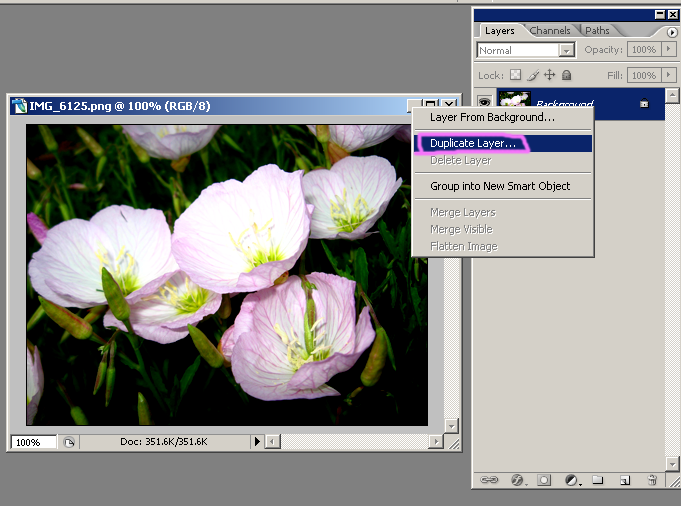
4. Now, right click on your background layer and select duplicate layer. A layer called: Background Copy will pop up, click on it.
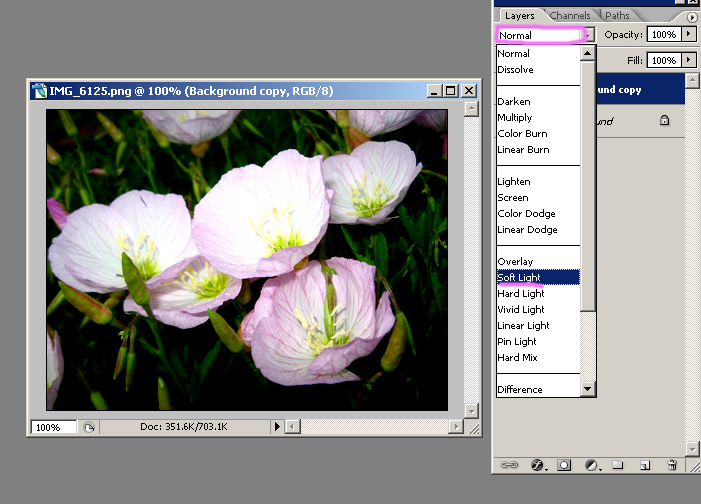
5. With the Background Copy layer still selected, click on the box above it that says: Normal and then select: Soft Light.
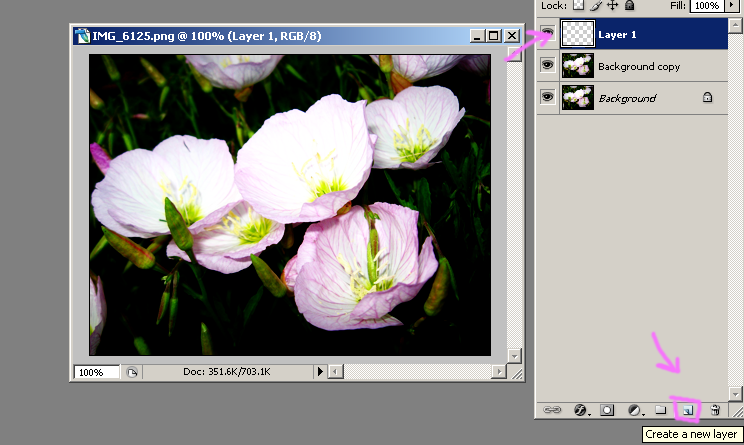
6. Click on the button called new layer, this will create a new layer to work on.
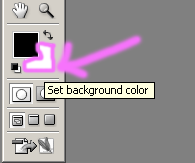
7. Now, we have to set the background color. Click on the icon that represents it on the left side of your screen, as shown below:
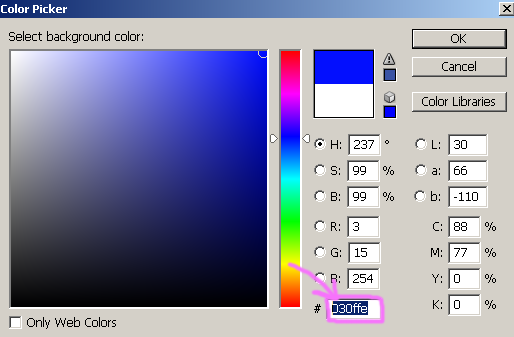
8. We have to set the color at a royal blue-ish color. Find use the brightest shade of the color. I set mine to 030ffe, you can copy and paste that in the little box at the bottom of the window, as shown below:
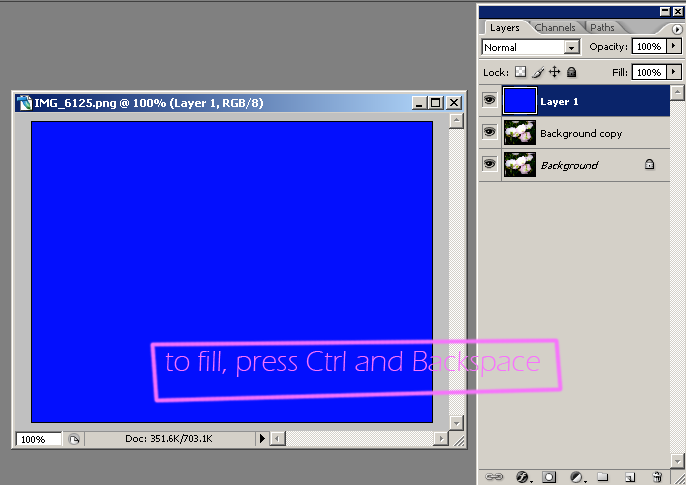
9. We have to fill this new layer with the blue color, to do this, make sure the new layer is selected and press Ctrl + Backspace
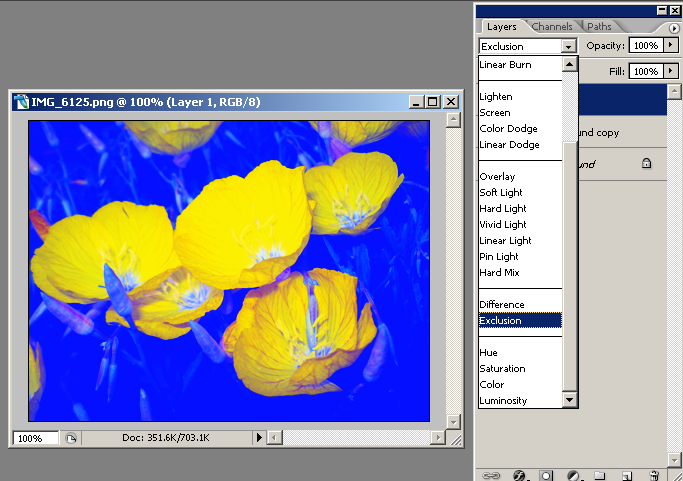
10. Click on the drop down box that says: Normal and select the option that says: Exclusion.
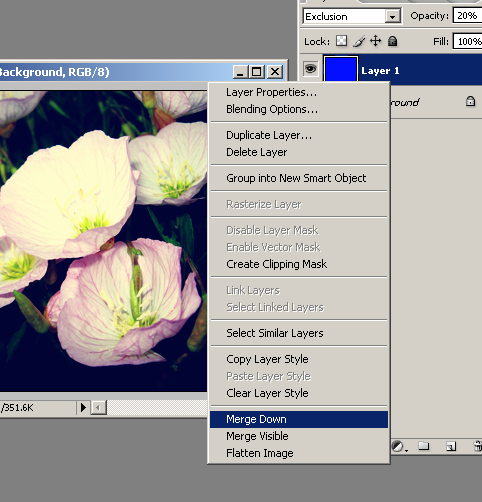
11. Set the opacity to 20% or whatever suits your photo based on the level of yellow you want in your picture.

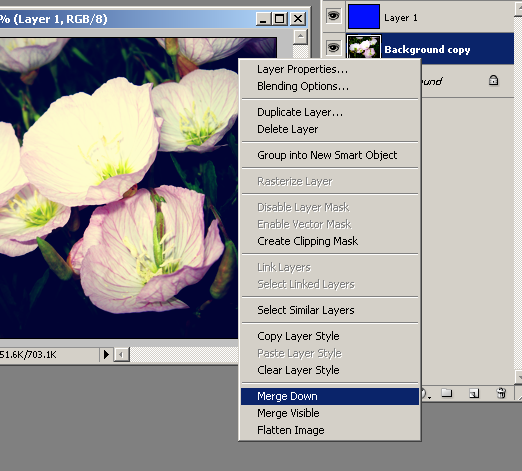
12. Merge the Background Copy layer with the background layer by selecting it, then right clicking on it and clicking on Merge Down. If you have any problems with that, you can also select the background copy layer and click on image at the top and merge down at the bottom.
13. Do the same thing to the color layer.
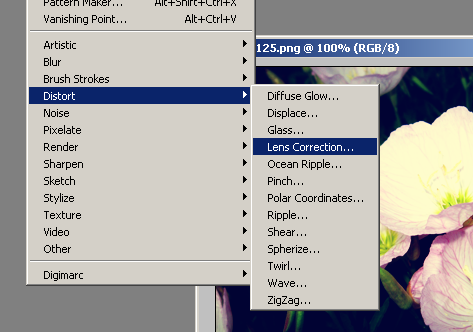
14. With all of your layers merged together, click on Filter at the top and then hover the arrow over Distort and then click on Lens Correction.
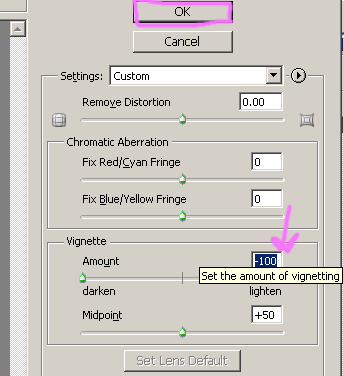
15. Set the vignette amount to -100 and then click OK.
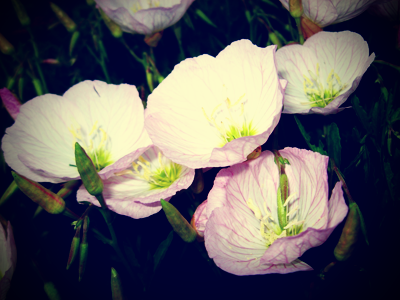
16. This is my final result:
ENJOY
1. Choose a photo that you want to use for this tutorial. I chose this image:
2. Now, we have to change the levels. Click on Image at the top and then hover your mouse over adjustments and select levels, which is the first choice that pops up.
3. I set mine to 50, 0, 255; but you may change yours to whatever you like or whatever suits your picture.
4. Now, right click on your background layer and select duplicate layer. A layer called: Background Copy will pop up, click on it.
5. With the Background Copy layer still selected, click on the box above it that says: Normal and then select: Soft Light.
6. Click on the button called new layer, this will create a new layer to work on.
7. Now, we have to set the background color. Click on the icon that represents it on the left side of your screen, as shown below:
8. We have to set the color at a royal blue-ish color. Find use the brightest shade of the color. I set mine to 030ffe, you can copy and paste that in the little box at the bottom of the window, as shown below:
9. We have to fill this new layer with the blue color, to do this, make sure the new layer is selected and press Ctrl + Backspace
10. Click on the drop down box that says: Normal and select the option that says: Exclusion.
11. Set the opacity to 20% or whatever suits your photo based on the level of yellow you want in your picture.
12. Merge the Background Copy layer with the background layer by selecting it, then right clicking on it and clicking on Merge Down. If you have any problems with that, you can also select the background copy layer and click on image at the top and merge down at the bottom.
13. Do the same thing to the color layer.
14. With all of your layers merged together, click on Filter at the top and then hover the arrow over Distort and then click on Lens Correction.
15. Set the vignette amount to -100 and then click OK.
16. This is my final result:
ENJOY
Tutorial Comments
Showing latest 10 of 20 comments

thank you so much!!!
By anonymous2272 on Mar 19, 2011 1:13 am

Love!!
By tattjunk on Dec 29, 2008 10:58 am

Awesome tutorial! Thank you
By daTTebayoBLITZ on Aug 1, 2008 2:34 pm

Awesome I'll have to try this.
By deadxdream on Jul 16, 2008 2:19 am

wicked :D
By electroxxxd on Jul 15, 2008 10:58 pm

love it , that's a pretty flower =]
By N4th4li3L on Jul 7, 2008 12:08 pm

okay. i couldn't find 'lens correction either' BUT if you go to FILTER and go down to Correct Camera Distortion... another window will open w/ the Vignette settings.
hope i helped.
By digitalivory on Jul 1, 2008 7:03 pm

lens corrections?
By fatmonsterx on Jun 23, 2008 1:52 pm

Pretty. :d
By impurities on Jun 21, 2008 9:39 pm

Lovely (:
heaps thanks.
x
By izzyy on Jun 18, 2008 5:40 pm
Tutorial Details
| Author |
emilyakastraightouttacompt
|
| Submitted on | May 21, 2008 |
| Page views | 28,061 |
| Favorites | 174 |
| Comments | 20 |
| Reviewer |
manny-the-dino
|
| Approved on | May 21, 2008 |