Tutorial
Click on thumbnailed images to enlarge
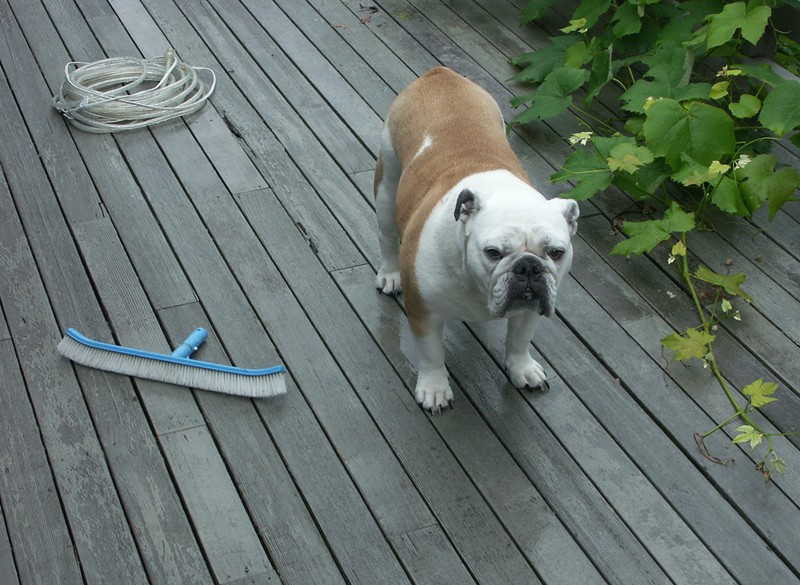
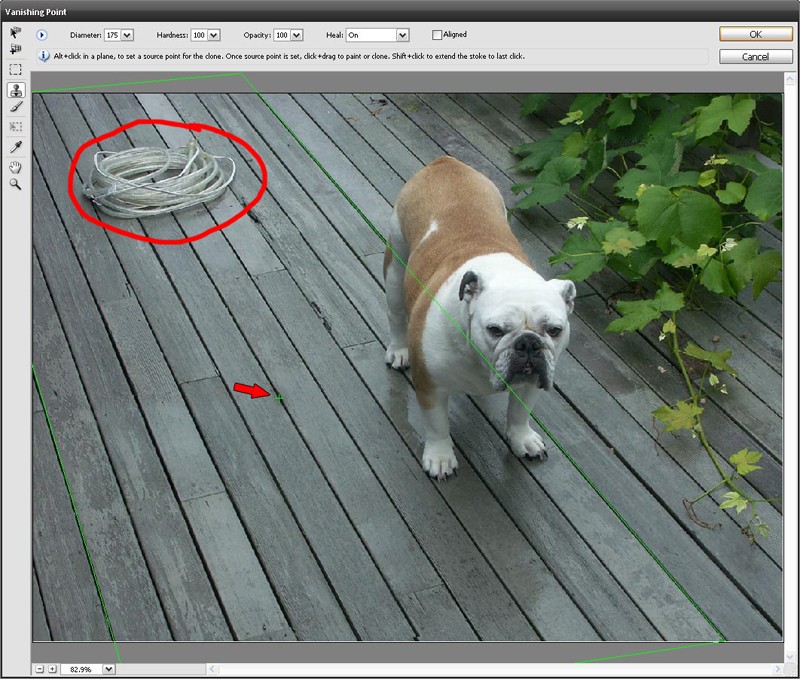
For the purpose of this tut I'll be working with this image and I'm going to clone part of the wood floor
1. So let's start by going to File → Open, look for your image and click Open
2. Now go to Filter → Vanishing Point or press the keyboard shortcut Ctrl + Alt + V
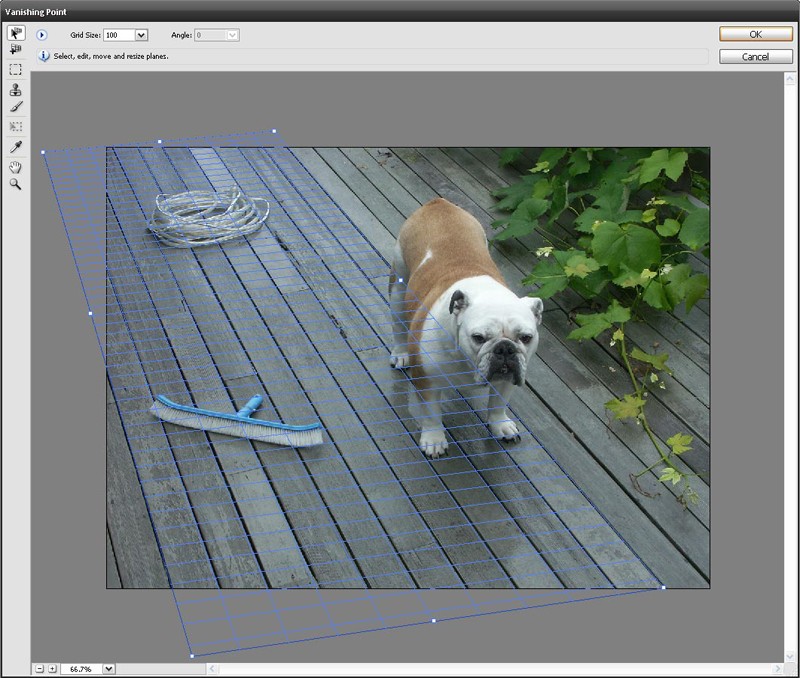
3. In the Vanishing Point dialog box you'll get a few tools to work with in the upper left corner of the dialog box. Select the Create Plane tool , this tool let's us create our grid for our Vanishing point
 When creating planes click in one corner, and then just click in each corner to create it. If you get a blue plane it means everything is good, if you get a yellow plane it means that PS can still work with that plane but it's telling you that you can do better than that, but if you get a red plane that means that PS can't deal with it at all. If you come out in your first try with a bad grid, or simply you would like to edit your grid, select the Edit Plane tool
  and drag the grid by the corner handles to edit it and you can even click inside the grid and drag to reposition it as well
4. Create your plane like in the image below
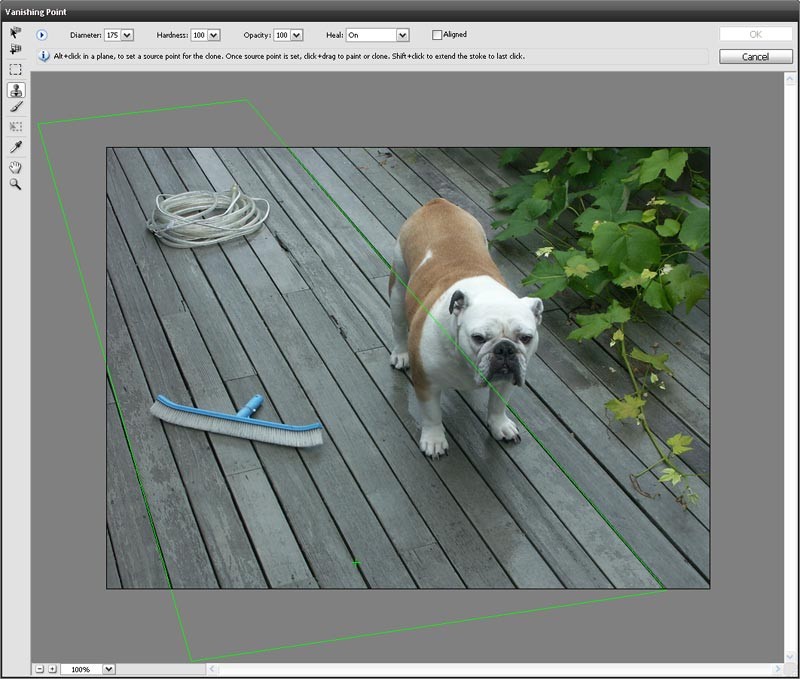
5. Select the Stamp tool , this tool will clone the parts of the image and works just like the Clone Stamp tool outside the Vanishing Point dialog box, but the only difference is that it clones in perspective. In the Heal drop down menu on the top of the Vanishing Point dialog box, select On and deselect the align check box

6. Now before we start cloning we have to set our source for the Stamp tool, you can do this by pressing and holding Alt and clicking away from the area that you want to clone. You'll notice that the source is already set when you get a green cross in your source point and your grid will change to green also. Be aware that the source is going to determine how your stamp tool is going to perform
7. You can use your bracket keys [ ] to change the size of your Stamp tool, and now click and drag on the parts that you would like to clone. Remember that you can set different sources for your Stamp tool when cloning different parts of your image
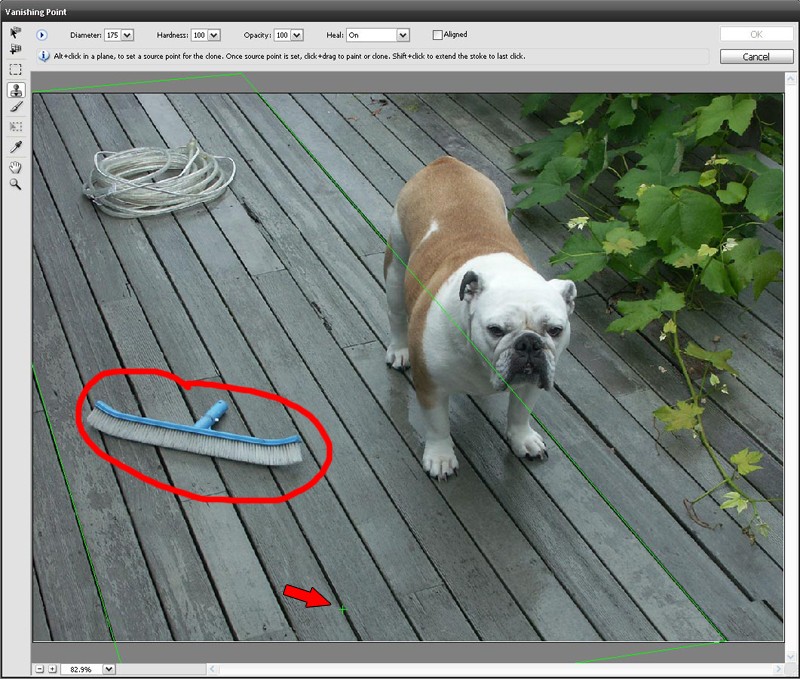
8. After you finish cloning click Ok and Voila!

(c) The Photoshop Group
1. So let's start by going to File → Open, look for your image and click Open
2. Now go to Filter → Vanishing Point or press the keyboard shortcut Ctrl + Alt + V
3. In the Vanishing Point dialog box you'll get a few tools to work with in the upper left corner of the dialog box. Select the Create Plane tool
, this tool let's us create our grid for our Vanishing point When creating planes click in one corner, and then just click in each corner to create it. If you get a blue plane it means everything is good, if you get a yellow plane it means that PS can still work with that plane but it's telling you that you can do better than that, but if you get a red plane that means that PS can't deal with it at all. If you come out in your first try with a bad grid, or simply you would like to edit your grid, select the Edit Plane tool and drag the grid by the corner handles to edit it and you can even click inside the grid and drag to reposition it as well4. Create your plane like in the image below
5. Select the Stamp tool
, this tool will clone the parts of the image and works just like the Clone Stamp tool outside the Vanishing Point dialog box, but the only difference is that it clones in perspective. In the Heal drop down menu on the top of the Vanishing Point dialog box, select On and deselect the align check box 6. Now before we start cloning we have to set our source for the Stamp tool, you can do this by pressing and holding Alt and clicking away from the area that you want to clone. You'll notice that the source is already set when you get a green cross in your source point and your grid will change to green also. Be aware that the source is going to determine how your stamp tool is going to perform
7. You can use your bracket keys [ ] to change the size of your Stamp tool, and now click and drag on the parts that you would like to clone. Remember that you can set different sources for your Stamp tool when cloning different parts of your image
8. After you finish cloning click Ok and Voila!
(c) The Photoshop Group
Tutorial Comments
Showing latest 10 of 10 comments

Mwuaahhhh....Great!!!
By Cupcake-S on Jul 9, 2008 10:15 am

This will come in VERY handy! Thanks so much.
By woofie on May 27, 2008 1:30 pm

Wow! That's amazing! Thank you for putting this up
By konekocat on Feb 22, 2008 1:23 pm

i dont knw, have you checked???
By elrene06 on Jan 19, 2008 10:54 pm
Does Photoshop CS have it?
By xmina on Jan 19, 2008 5:22 pm
photoshop cs3 extended version
By elrene06 on Jan 18, 2008 10:17 pm
When I do CTRL + ALT + V, nothing happens, what version do you have?
By xmina on Jan 18, 2008 7:38 pm

Thank you for pointing out this feature.
By bluelily on Jan 12, 2008 6:54 pm

wow. thank you so much.
By twodreamlovers on Jan 11, 2008 7:23 pm

*muah*
thank you very muchhhh :]
By takle_monster on Jan 11, 2008 10:12 am
Tutorial Details
| Author |
elrene06
|
| Submitted on | Jan 10, 2008 |
| Page views | 22,237 |
| Favorites | 127 |
| Comments | 10 |
| Reviewer |
Relentless
|
| Approved on | Jan 11, 2008 |