Tutorial
Click on thumbnailed images to enlarge
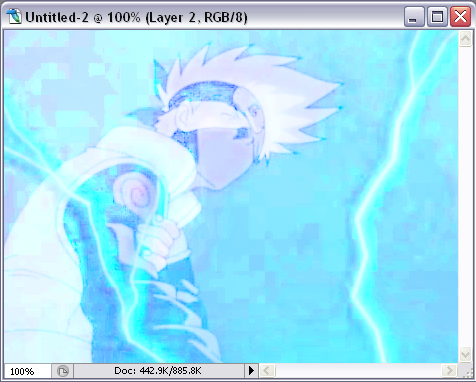
1. Open up the image that you would like to have the sketchy effect upon. Press (Ctrl + A) to select the whole image. Then press (Ctrl + C) to copy it. Close the image window afterwards. I'm using a screenshot of Kakashi from the Anime series Naruto.

2. Press (Ctrl + N) to open up the new window. Select 'WHITE' as the background. Click OK.

In that new window, press (Ctrl + V) twice so that we will have two layers of the image.

3. If you already have the Layers window open, that would be better. If not, go to Window and select Layers. With Layer 2 as the selected layer, you would see there right below the word 'Layers' a drop down box with the word 'Normal' in it. From that box, select "Color Dodge." (They're all going to look differently, so don't panic.)

4. After that, press (Ctrl + Shift + U) to Desaturate the image. (Like showed below)

5. Then press (Ctrl + I) to Invert colors.
6. Now select Layer 1 as the working layer. Again, press (Ctrl + Shift + U). You would see that most of the image is "gone". (Mine is a total blank.) Don't worry. It's supposed to be like that.
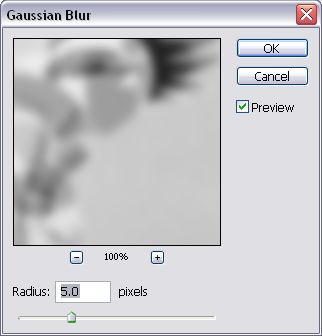
7. Now select Layer 2 again. Go to Filter > Blur > Gaussian Blur. Select the amount for the radius you want. (I would highly recommend that it would not exceed 9 or go below 1. It depends on you.)
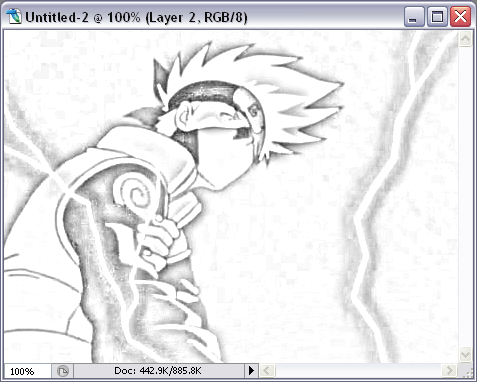
8. You're done! Here's my final result:
2. Press (Ctrl + N) to open up the new window. Select 'WHITE' as the background. Click OK.
In that new window, press (Ctrl + V) twice so that we will have two layers of the image.
3. If you already have the Layers window open, that would be better. If not, go to Window and select Layers. With Layer 2 as the selected layer, you would see there right below the word 'Layers' a drop down box with the word 'Normal' in it. From that box, select "Color Dodge." (They're all going to look differently, so don't panic.)
4. After that, press (Ctrl + Shift + U) to Desaturate the image. (Like showed below)
5. Then press (Ctrl + I) to Invert colors.
6. Now select Layer 1 as the working layer. Again, press (Ctrl + Shift + U). You would see that most of the image is "gone". (Mine is a total blank.) Don't worry. It's supposed to be like that.
7. Now select Layer 2 again. Go to Filter > Blur > Gaussian Blur. Select the amount for the radius you want. (I would highly recommend that it would not exceed 9 or go below 1. It depends on you.)
8. You're done! Here's my final result:
Tutorial Comments
Showing latest 2 of 2 comments

THnx!
ii Love It!
By 9ii6yhunglaydee on Jul 8, 2008 5:19 pm

this is too hot...THANX
By RavenNoelle on Jun 9, 2007 5:31 pm