Tutorial
Click on thumbnailed images to enlarge
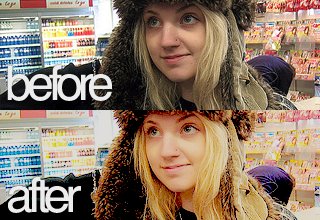
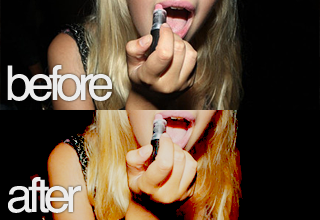
We're going to try to soften out the pinks/reds of a photo with a few adjustments. :)
NOTE: This tutorial works better if you use pictures with the color red on them!
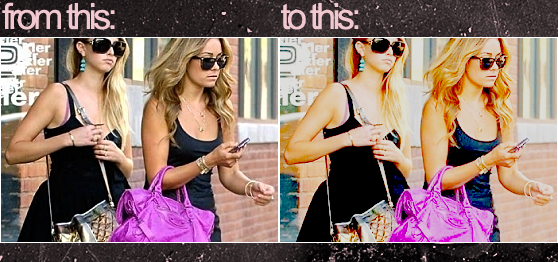
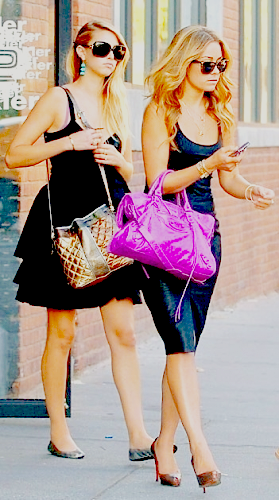
1. Open up your image in Photoshop. I'll be using this awesome picture of Lauren and Whitney who *used* to be on The Hills (I'm still not over the fact that they both left!). You can just copy it and follow along if you like. Once you've opened it, sharpen it by going to Filter >> Unsharpen Mask and simply click OK (no need to play around with the settings). You don't really have to do this, but for this image, I chose to.
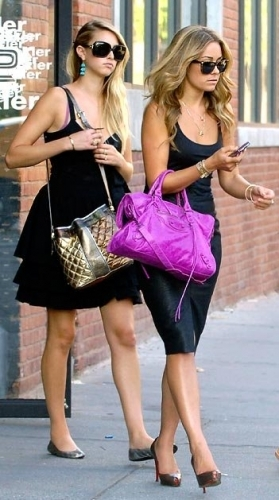
2. Duplicate the layer. Set it to Screen @ 50% Opacity .
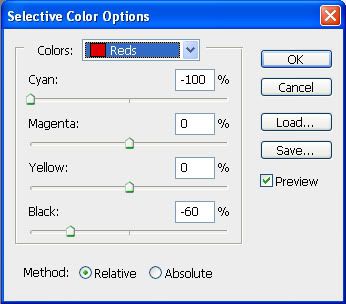
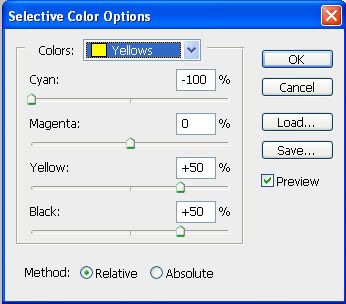
3. Then go to Layer >> New Adjustment Layer >> Selective Coloring and follow my settings:
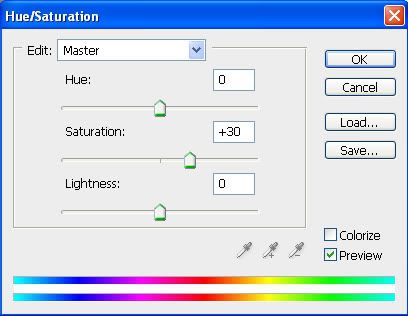
4. Then go to Layer >> New Adjustment Layer >> Hue/Saturation and follow my settings:
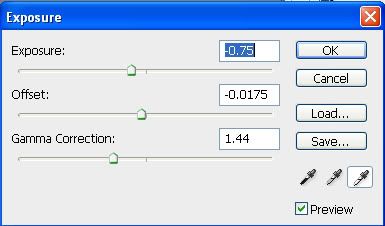
5. Then go to Layer >> New Adjustment Layer >> Exposure and follow my settings:
6. Make a new layer and fill it with the color #e5dac1 and set it to Overlay @ 25% Opacity .
Your image should look like this now:
Other Examples:


More Sweet Tutorials?
Tutorial Comments
Showing latest 5 of 5 comments

thank you :D
By angel7 on Jul 16, 2010 11:11 am

THANKS! :D
By impurities on Dec 30, 2009 8:26 pm

OMG i miss lauren & whitney too!
i love how the coloring brightens the image ;D
this effect reminds me of flash on a camera xD
By creole on Oct 24, 2009 4:27 pm

Lovely (:
By futura on Oct 21, 2009 7:08 pm

This was nice and fun :D
Thank You! :)
By buddyboy on Oct 15, 2009 4:09 pm
Tutorial Details
| Author |
broken-doll
|
| Submitted on | Oct 13, 2009 |
| Page views | 15,457 |
| Favorites | 62 |
| Comments | 5 |
| Reviewer |
manny-the-dino
|
| Approved on | Oct 13, 2009 |